Crafting Station
The assumption is you've already created your mod folder, Primal Game Data and Mod Data Asset before proceeding.
Intro
The essentials required to create a crafting station are as follows:
- A structure, the building you see in the world.
- A inventory component, to control what is inside(slot count, craftables, etc).
- An item, to place the structure.
- An engram, to learn the item.
Step 1 - Create The Structure
- RClick in your mod folder and create a new Blueprint Class
- Use the parent class
StructureItemContainerBaseBP - Name it something sensible.
- Use the following settings for Class Defaults
- Static Mesh
- Auto Activate Container
- Descriptive Name
- Use Placement Collision Check
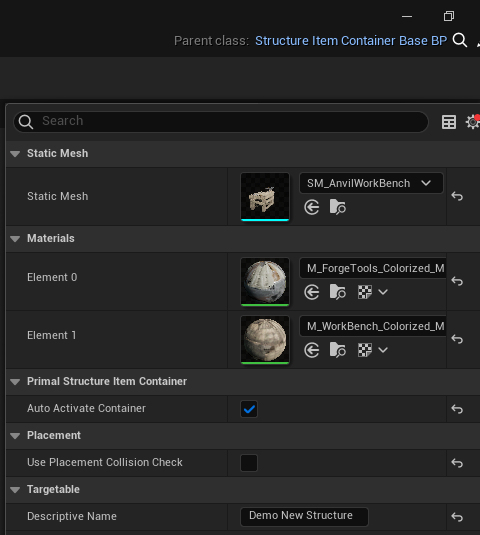
I turned Use Placement Collision Check off just to simplify the process. Normally you would leave it on and adjust the placement settings, otherwise this structure can collide with all other building pieces.
Step 2 - Create Inventory Component
- RClick in your mod folder and create a new Blueprint Class
- Use the parent class
PrimalInventoryComponent - Name it something sensible
- Use the following settings for Class Defaults
- Allow Remote Crafting
- Use Craft Queue
- Remote Inventory Description String
- Default Inventory Items
- Add any items you want to be craftable in here
- Inventory Name Override
- All Default Inventory Is Engrams
- Force Allow Crafting For Inventory Components
- Add any
InventoryComponentclasses you want to force allow to be craftable in here
- Add any

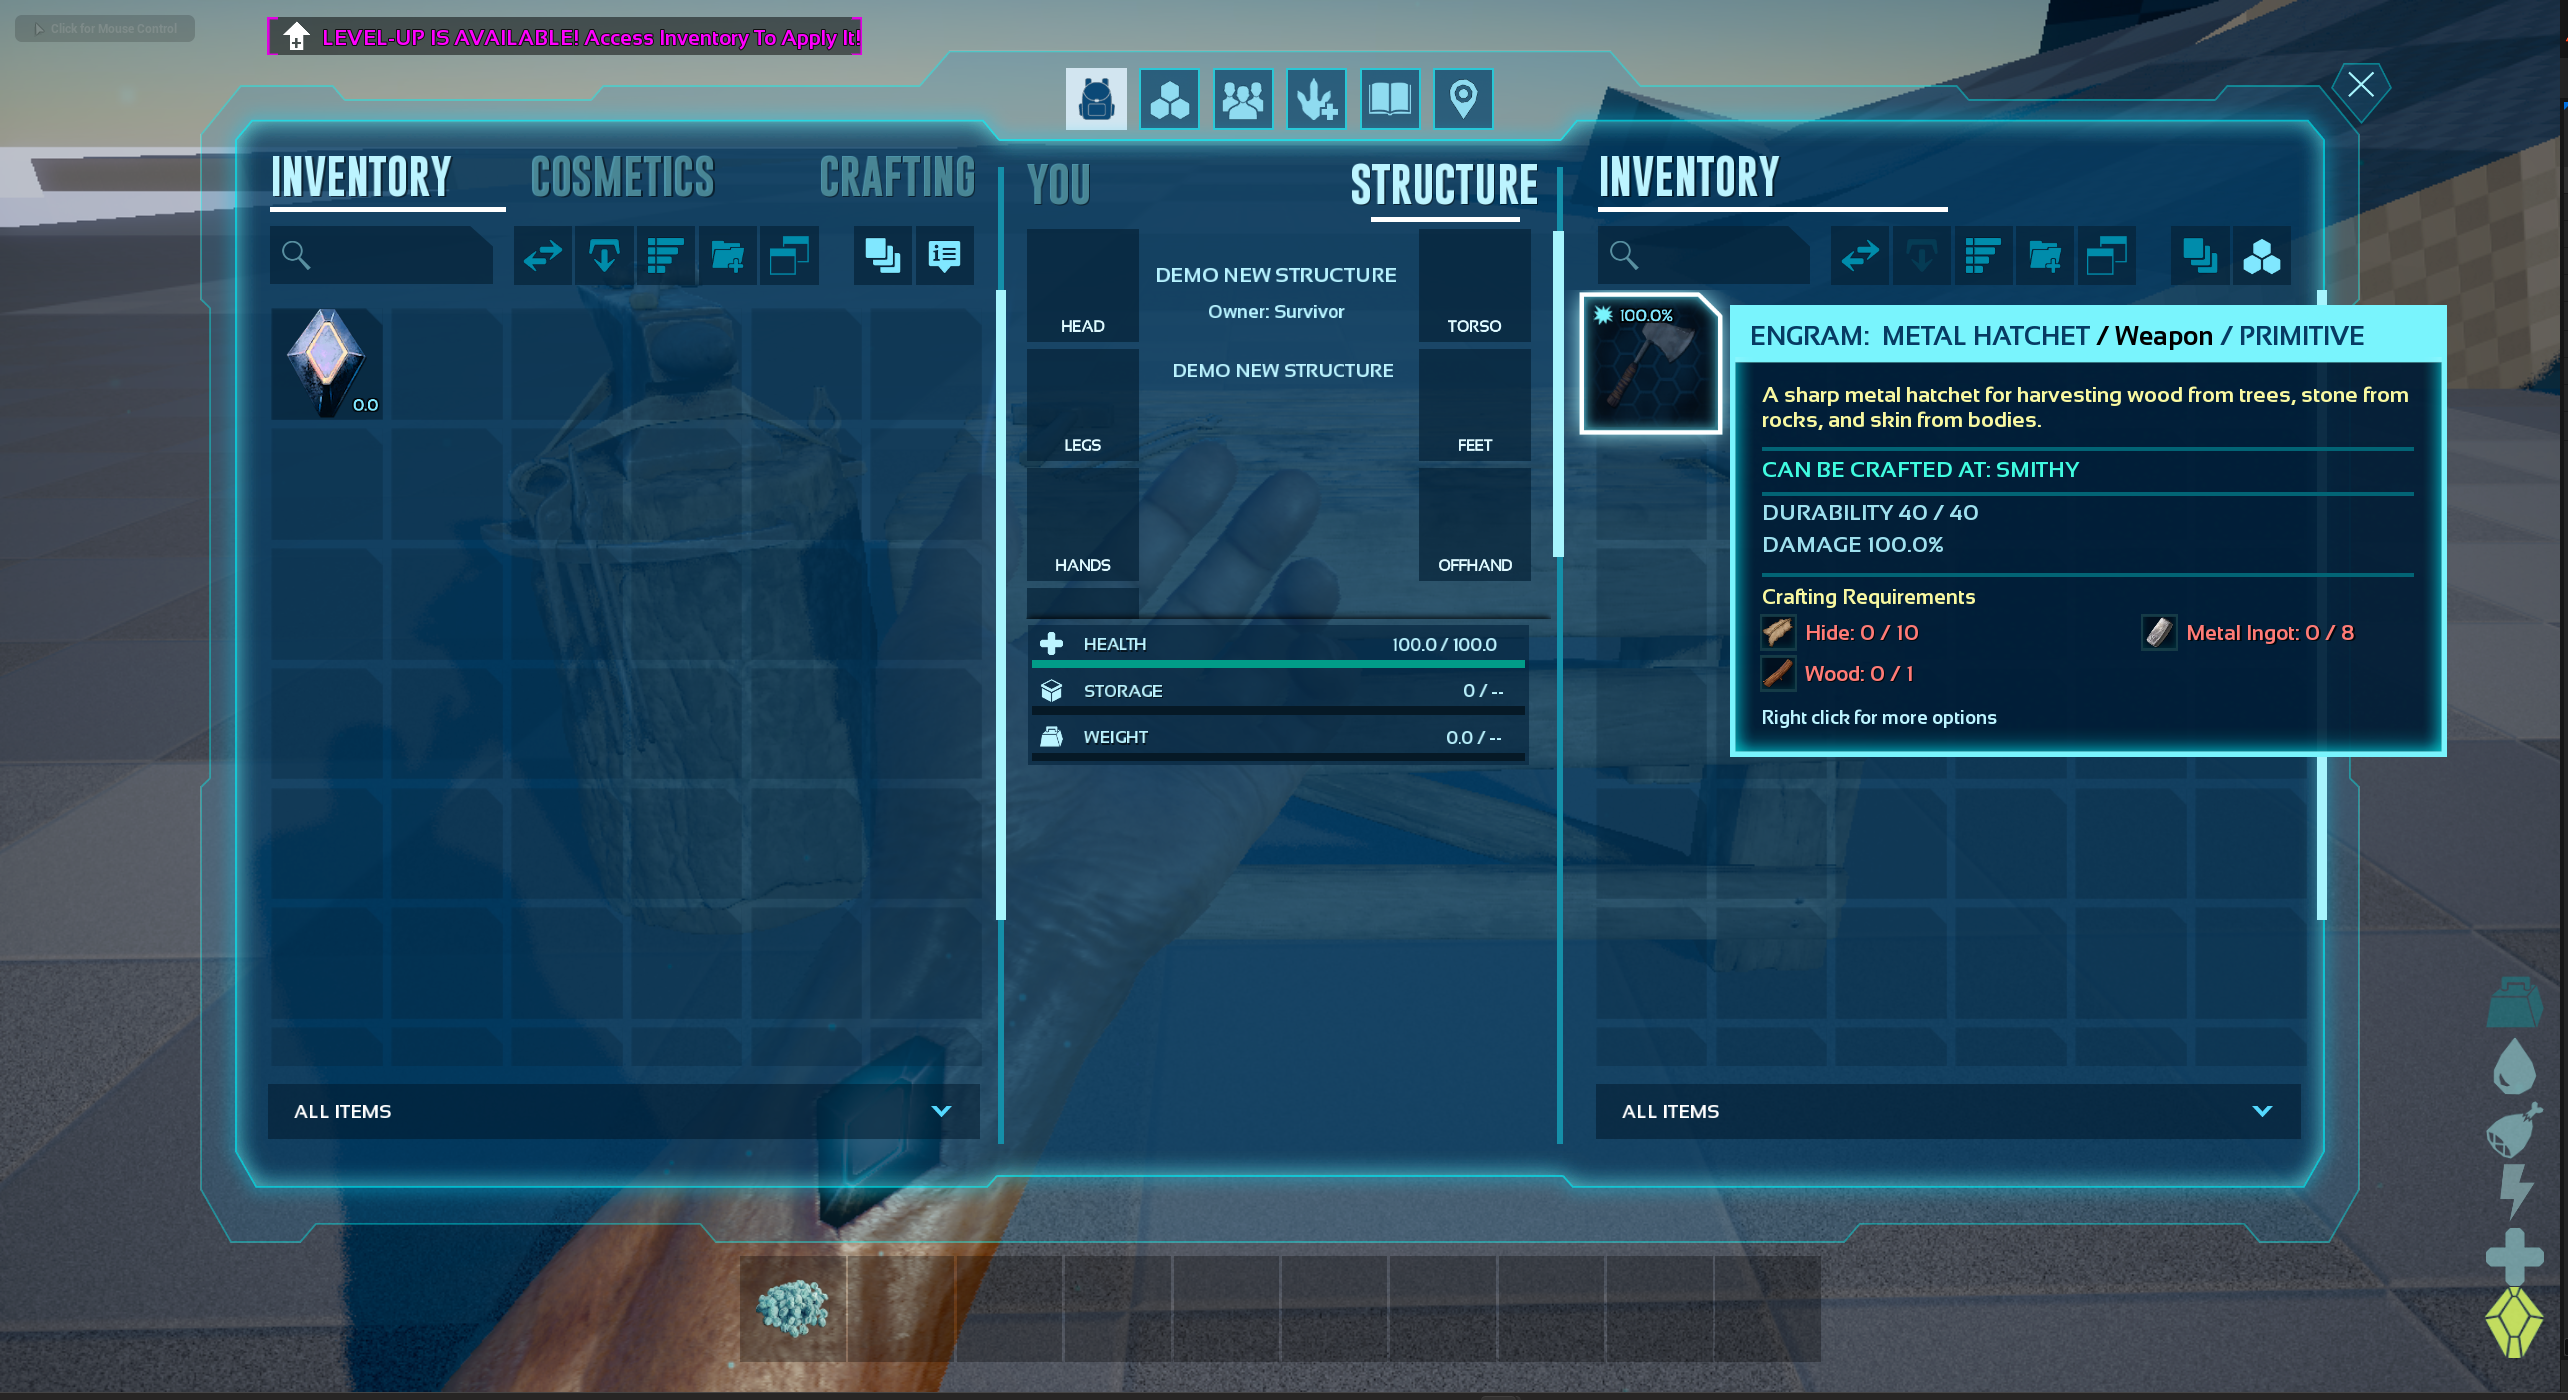
You do not need Force Allow Crafting for Inventory Components to be used, unless you're adding items that normally require being crafted in other inventories. ie. Metal Hatchet and the Smithy
Step 3 - Create The Primal Item
- RClick in your mod folder and create a new Blueprint Class
- Use the parent class
PrimalItemStructureGeneric - Name it something sensible
- Use the following settings for Class Defaults
- Descriptive Name Base
- Item Description
- Item Icon
- Structure To Build
- This is the Structure Blueprint created in step 1

There are likely other settings you will want to play with to get it to your like(crafting requirements, icon, name, etc).
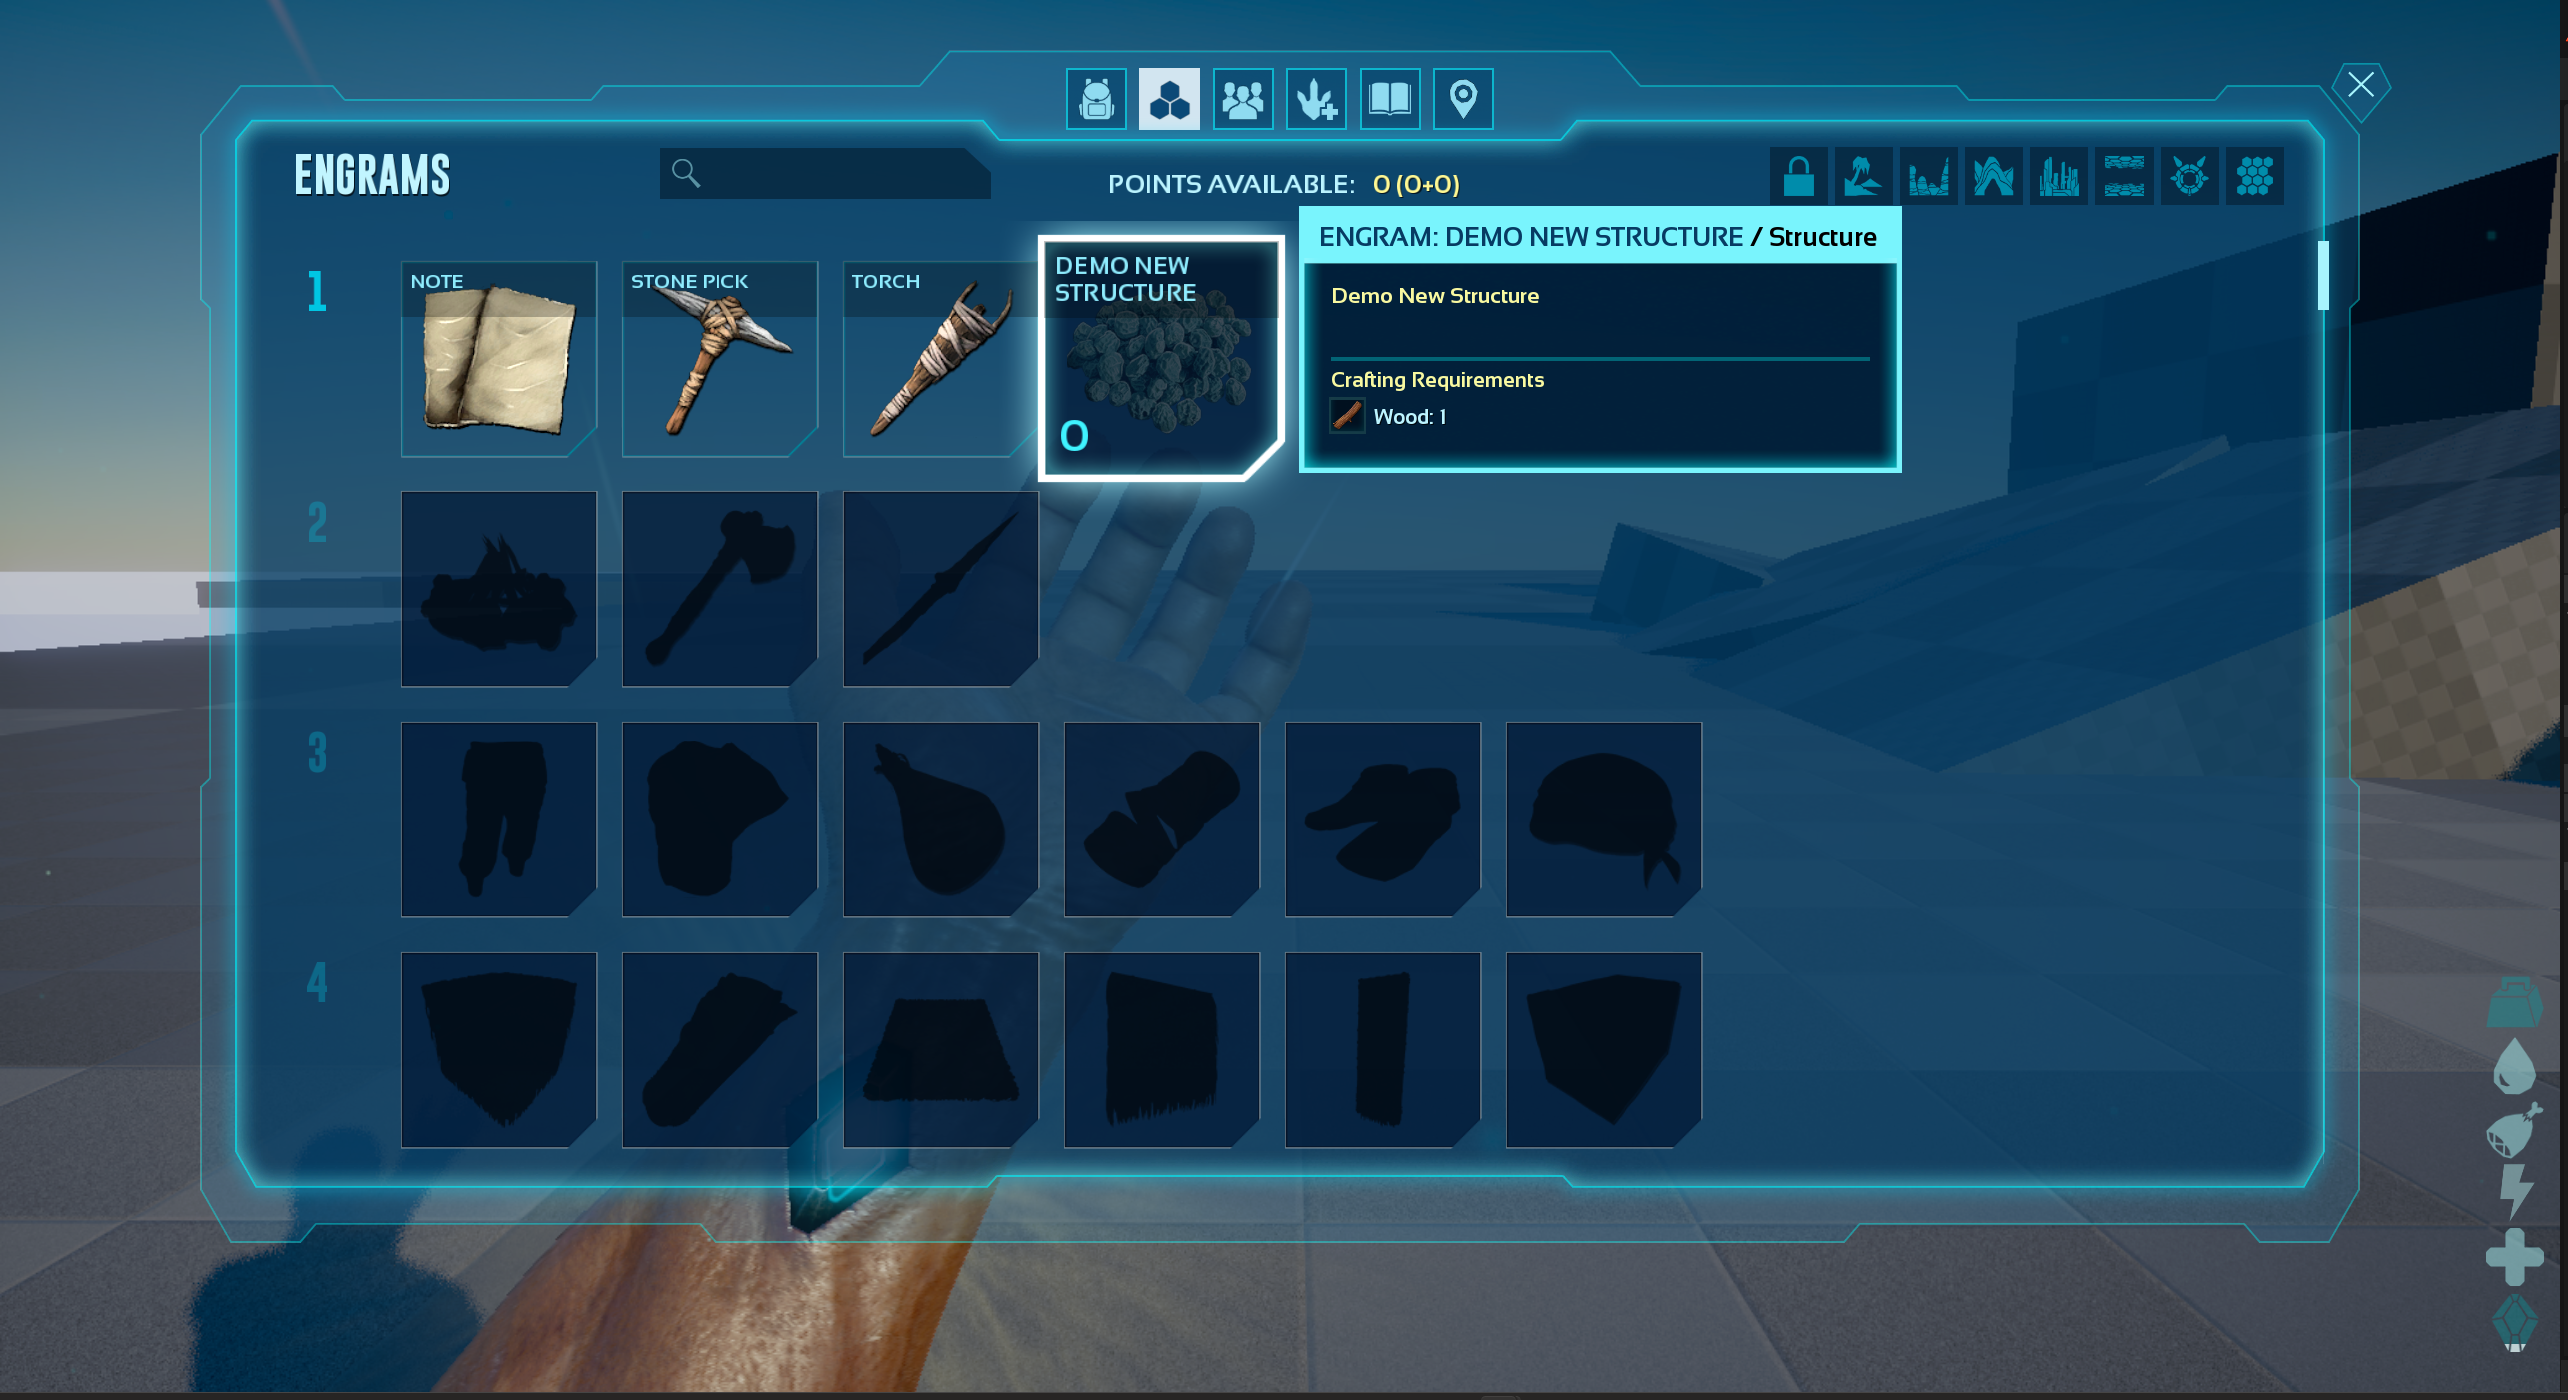
Step 4 - Create The Engram Entry
- RClick in your mod folder and create a new Blueprint Class
- Use the parent class
PrimalEngramEntry - Name it something sensible
- Use the following settings for Class Defaults
- Required Character Level
- Required Engram Points
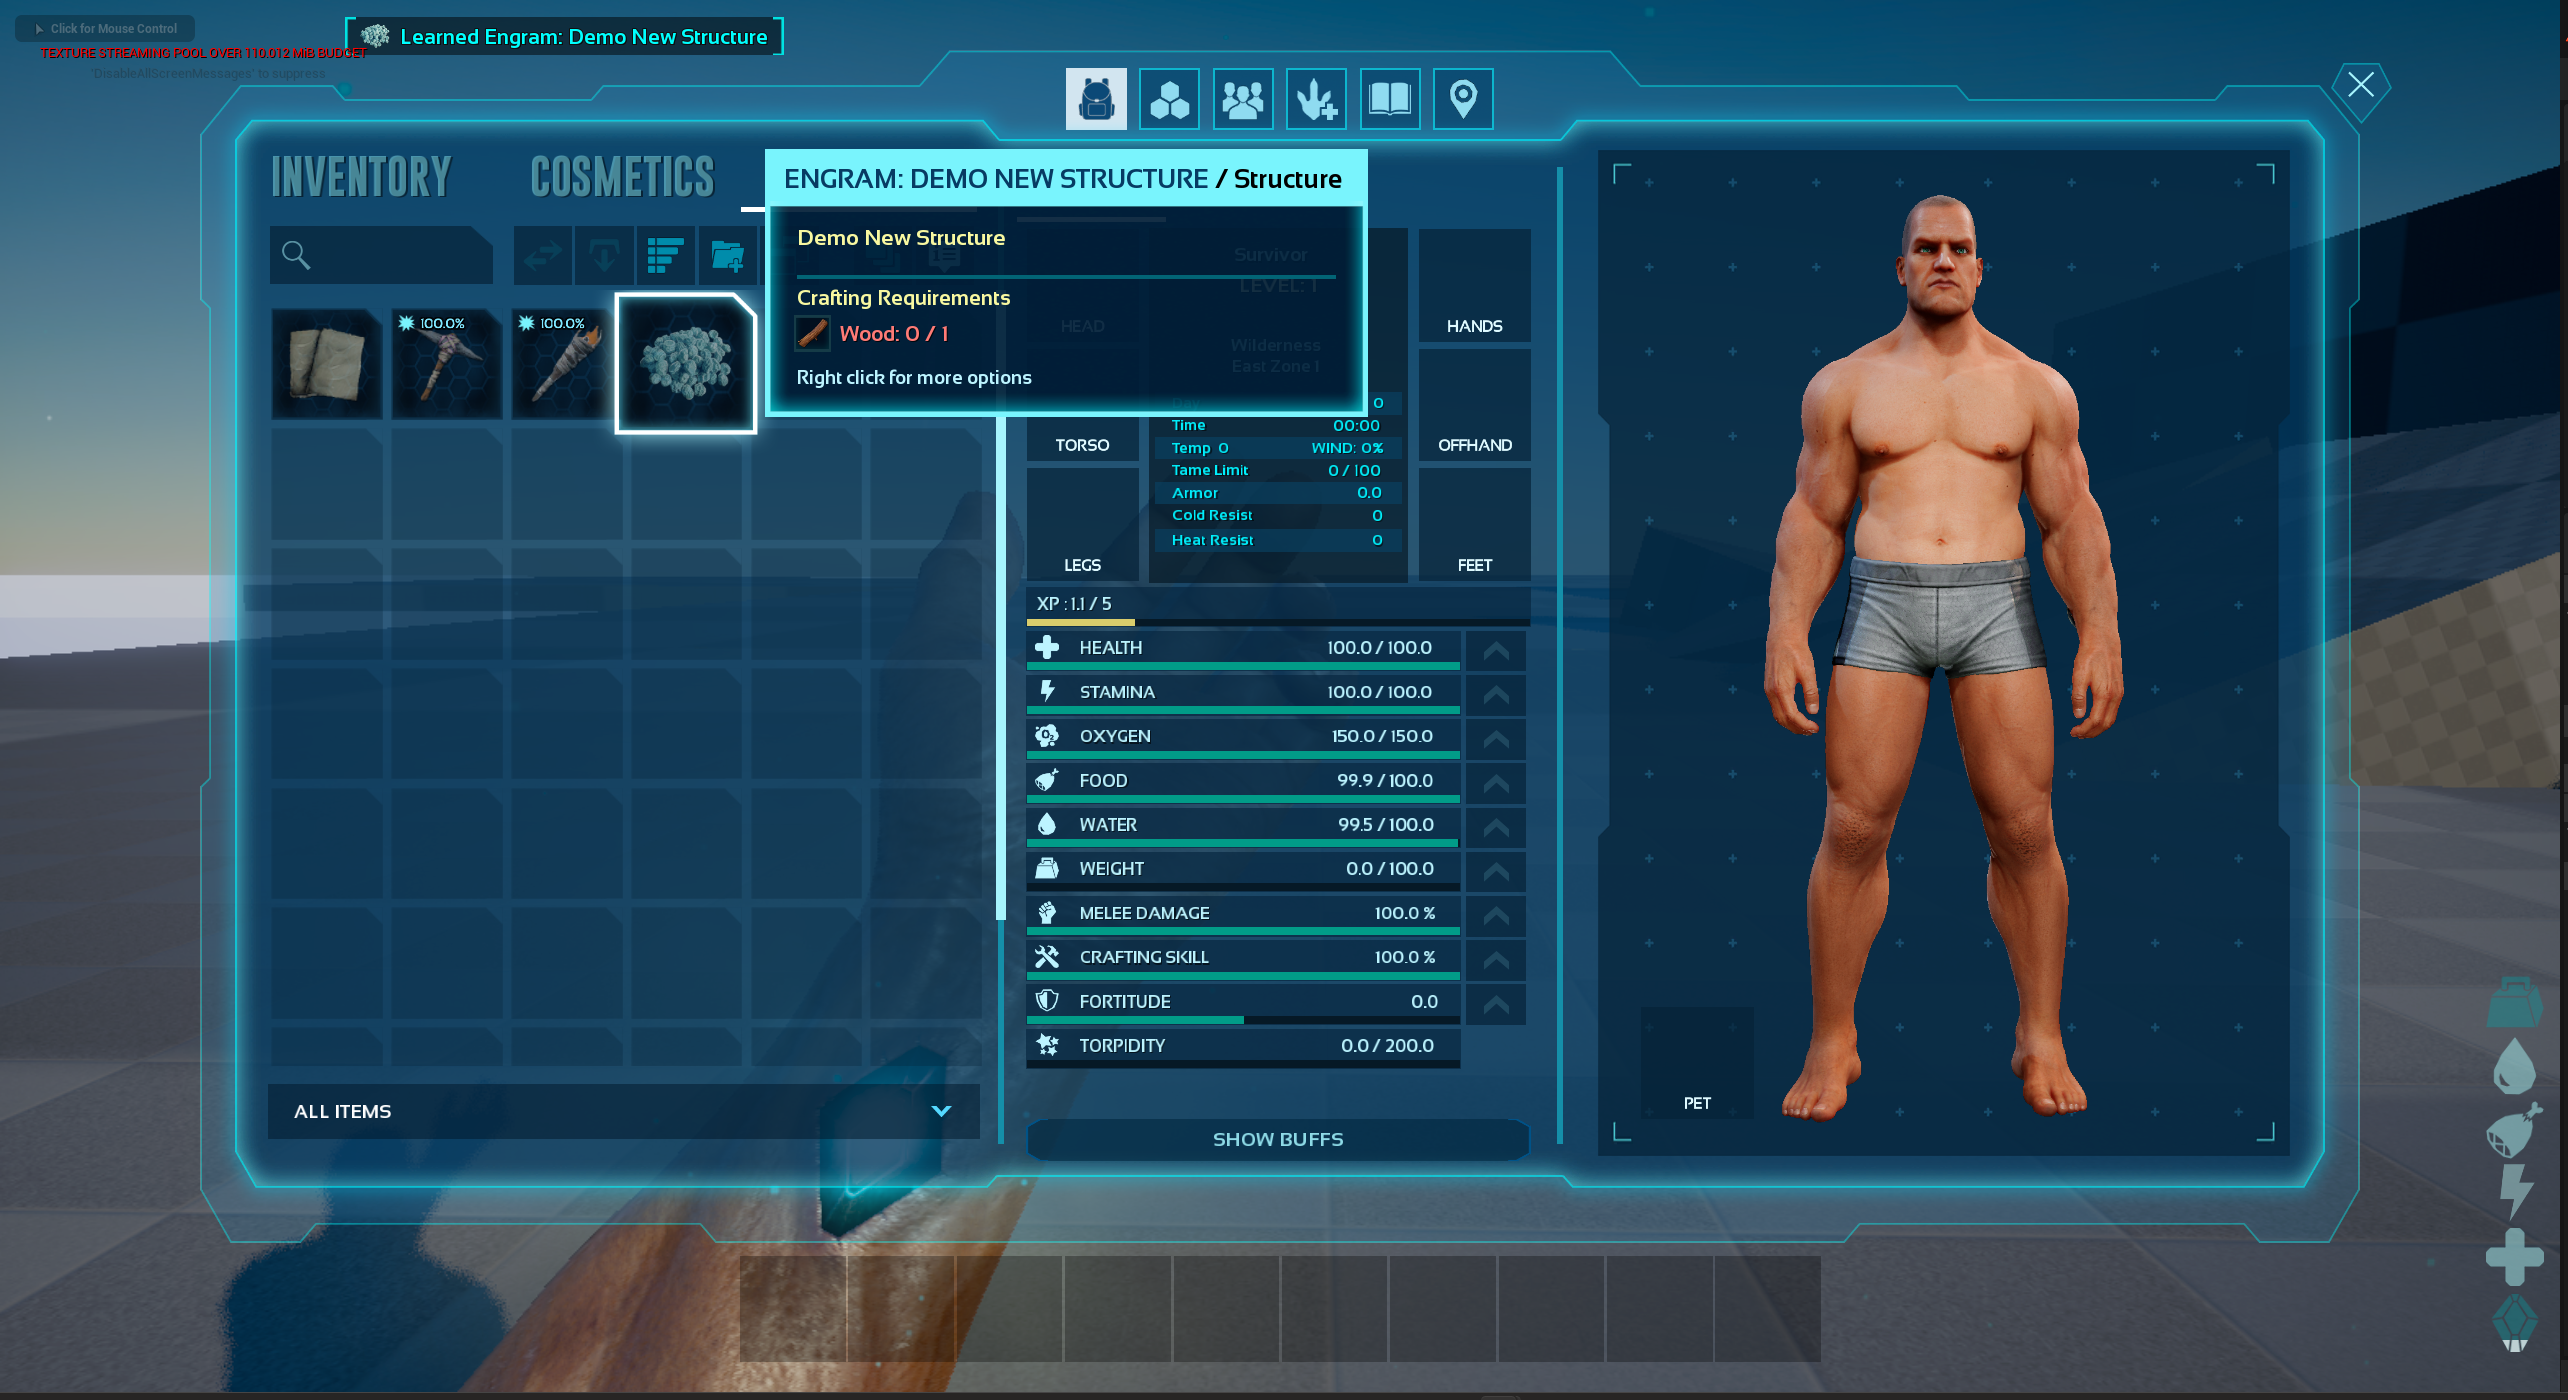
- Give Blueprint to Player Inventory
- Can Be Manually Unlocked
- Blue Print Entry
- This is the item created in step 3
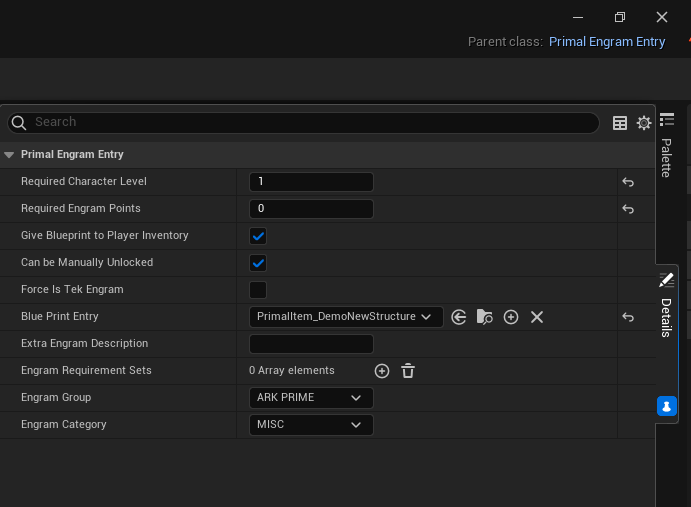
Give Blueprint to Play Inventory allows the item to be crafted in your inventory
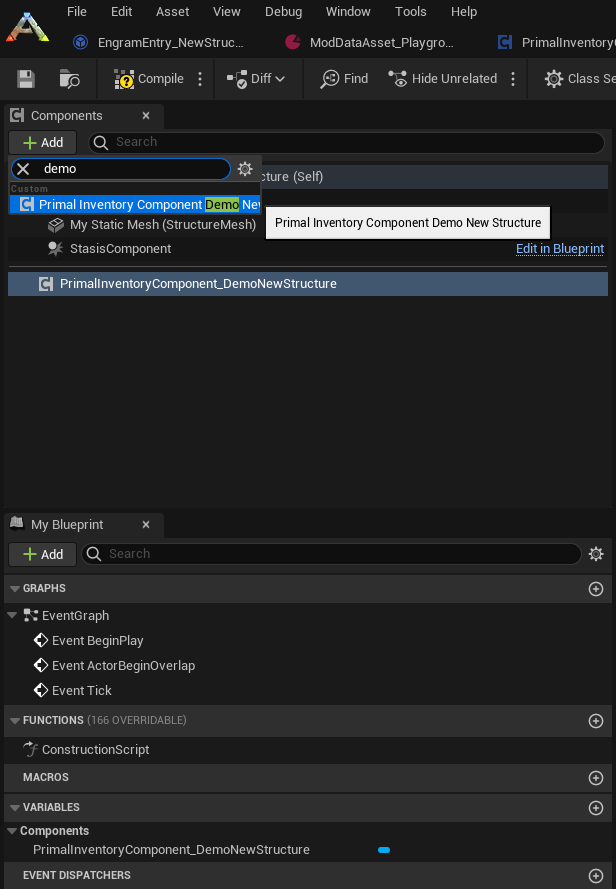
Step 5 - Add Inventory Component to Structure
- Open Structure blueprint.
- Click Add in the Components window.
- Select your newly created inventory component.
Step 6 - ModDataAsset Config
- Open your
ModDataAsset(MDA)blueprint in your root mod folder - Add the following fields
- Additional Engram Blueprint Classes
- The EngramEntry from step 4
- Additional Structures to Place
- The Structure from step 1
- Additional Structure Engrams
- Additional Engram Blueprint Classes

If you want your item to be crafted in a vanilla container, Additional Structure Engrams is the field to add it to. You fill in For Class with the Structure you want to add it to(ie: StorageBox_AnvilBench) and the Item you want to add to it(ie: your newly created PrimalItem)
--- Results ---
Engrams
Structure Player Inventory
tructure Vanilla Smithy
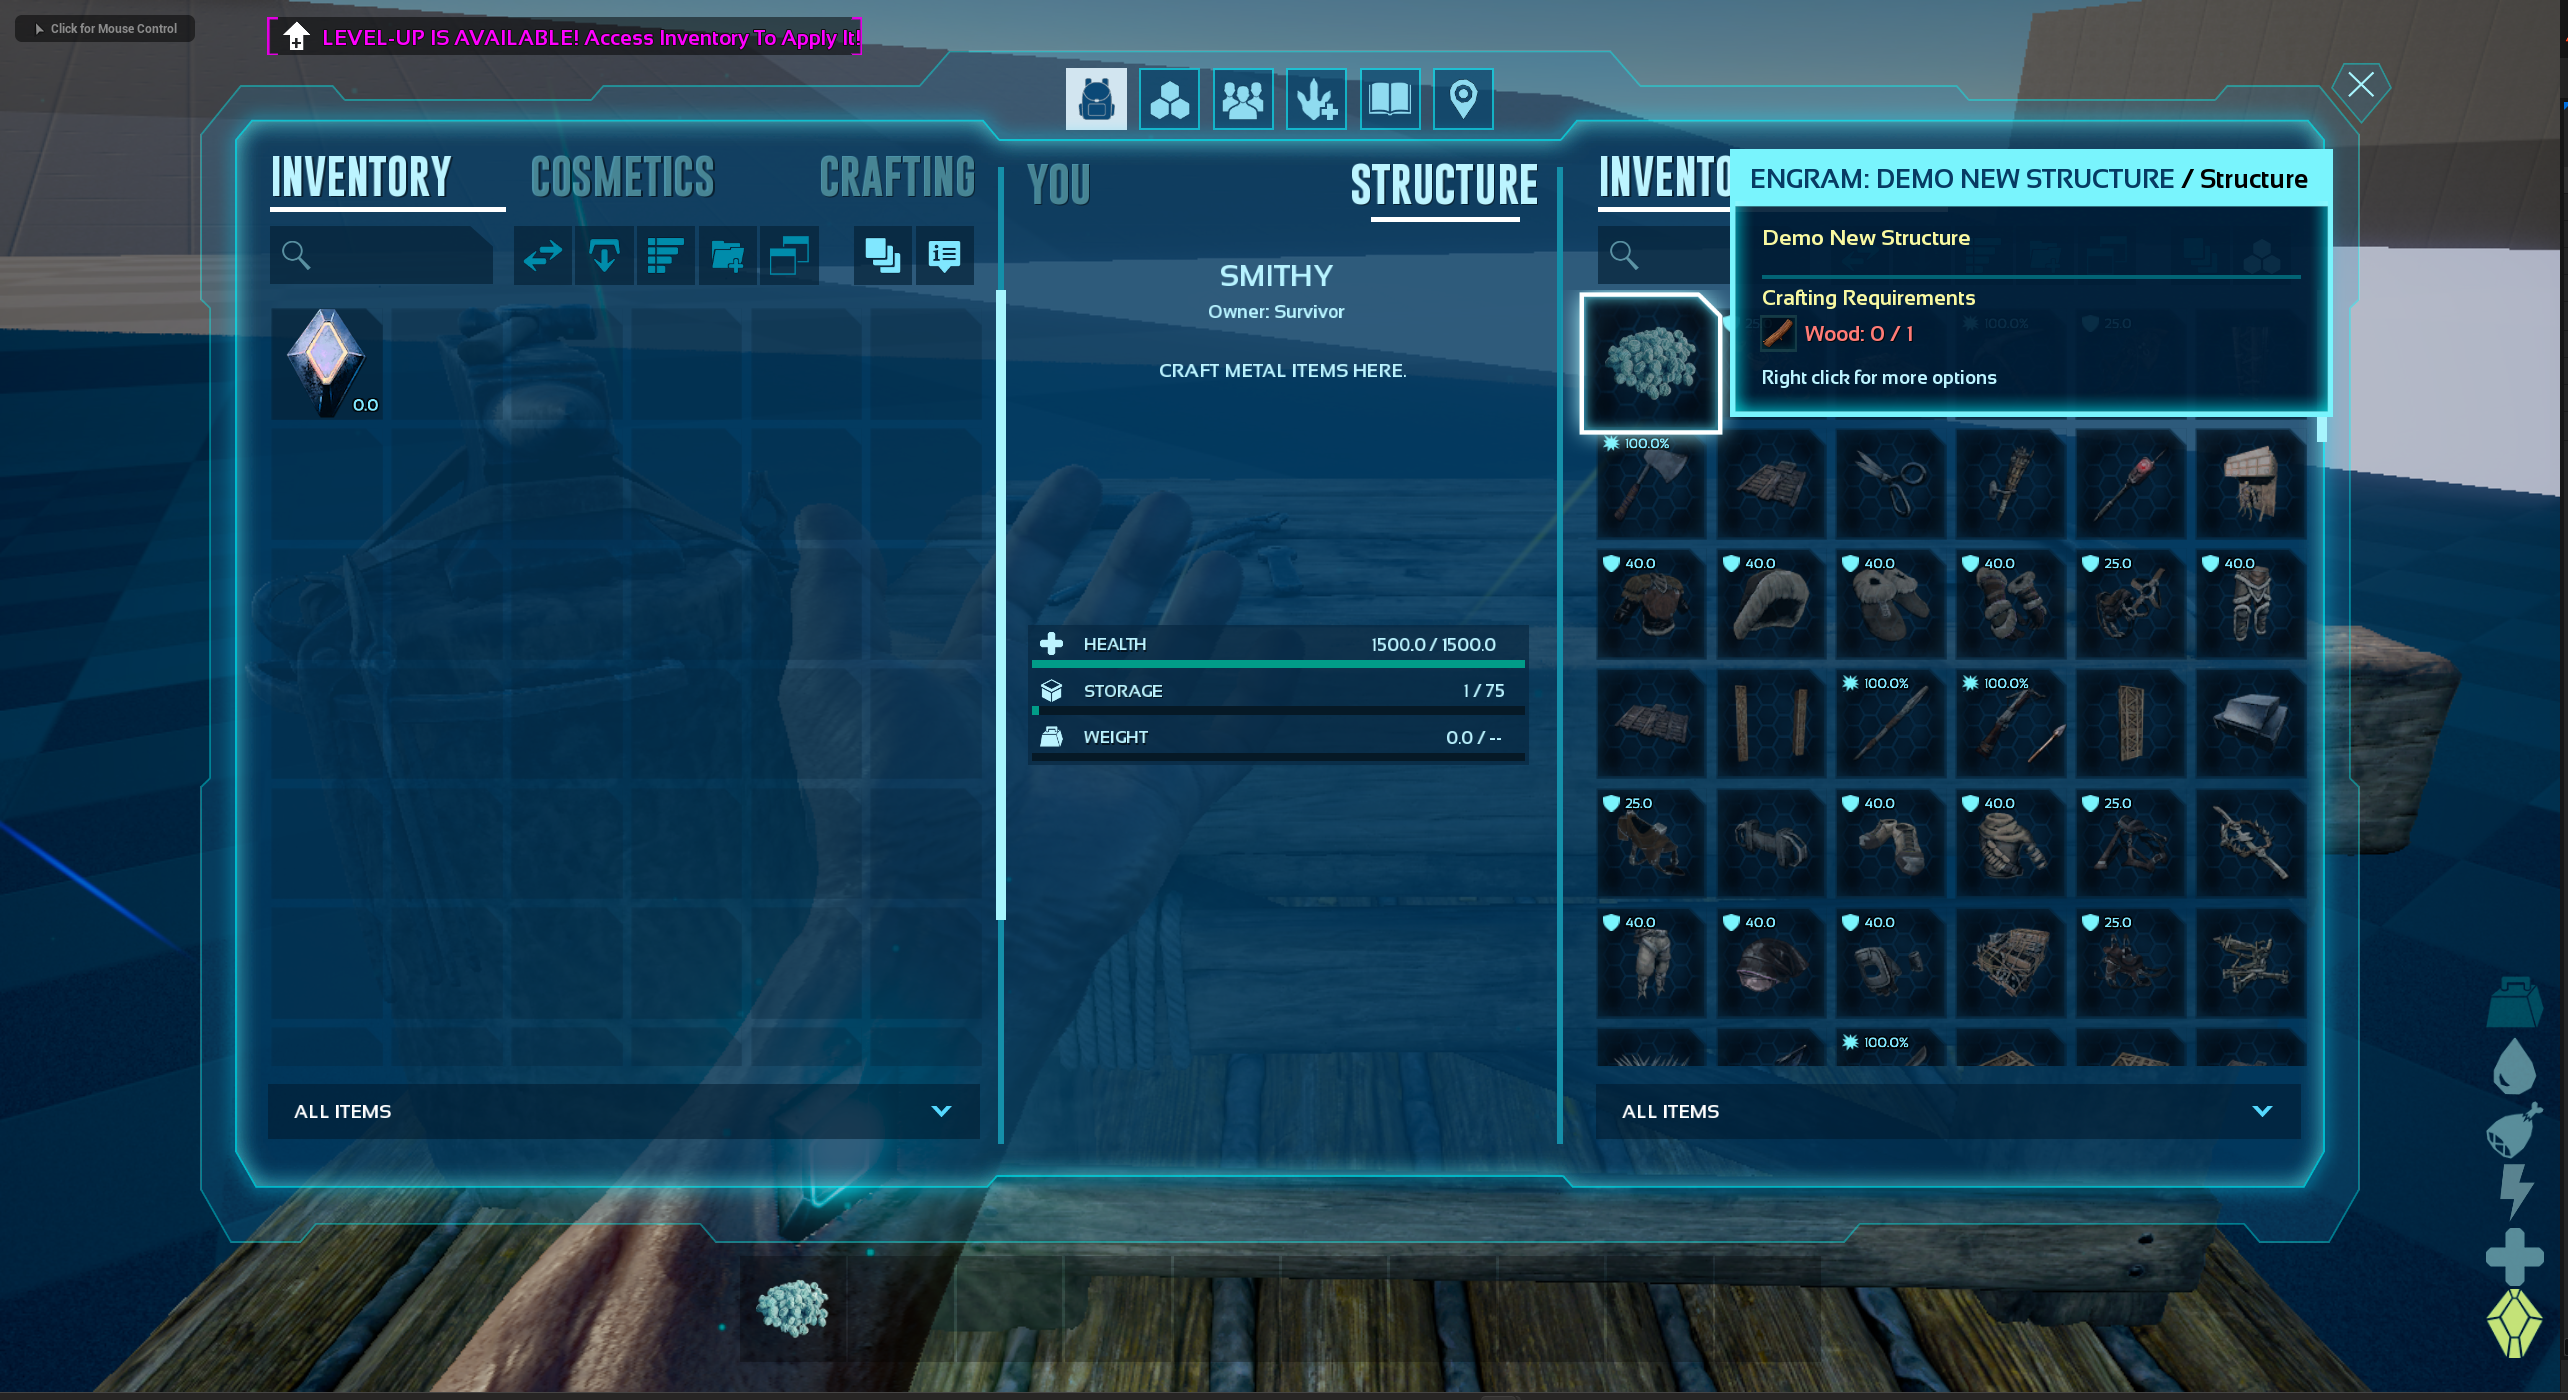
Vanilla Items in Custom Structure